
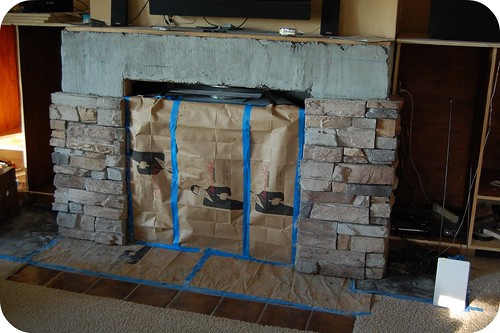
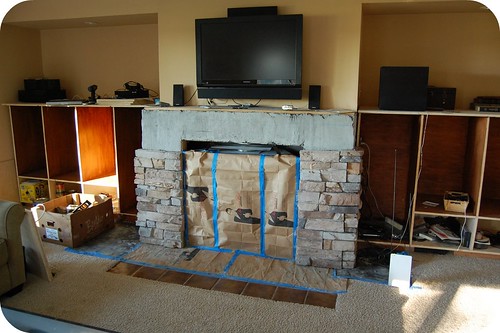
Here are the pictures showing the stone about 80% complete (we thought we’d have enough stone but didn’t so had to order some more and finished it the following weekend). Please ignore the chaos going on in the ‘cabinets’ – they became our temporary tool storage area, but now Ivan’s mobile and getting into everything so we’ve put most of the tools away in their proper home in the garage.
The whole process wasn’t too difficult – if you’ve installed tile, you can probably handle stone veneer. The first step was to prepare the surface for the stone which involved a layer of roofing felt (free from my father-in-law), wire lath (from local stone supplier), and a scratch coat. The roofing felt went onto the drywall easily with the staple gun making sure to overlap the seams. The wire lath was then installed - again using the staple gun and trying to make sure it goes on flat and tight around the corners. We used tin snips to cut it to size and I would recommend leather gloves because the edges are pretty sharp.
The most difficult part was then installing the scratch coat (mortar mix) over the wire lath but once we got the mortar mix to correct consistency my handy hubby was able to muscle it into and over the wire lath with a flat trowel. Oh and I almost forgot, as you can see in the pictures we covered up and taped off the flooring and the fireplace really well before we started with the mortar which I highly recommend because it can turn into a messy job. Once the mortar had set up a little bit we just lightly brushed it with a bristled brush to give it some texture – hence the name scratch coat.
Once all the prep work was done then came the fun part – actually installing the stone. We did a dry layout of a couple courses of stone so we could kinda get familiar with the pattern and what looked good. Then we cut the stone down to size where required with a tile cutter (borrowed from our awesome neighbors). We also had Jens’ cousin helping us out during this part – he was the designated mortar mixer. I was placing the laying out, buttering the back of, and placing the stone, and Jens was cutting the stone. With our three person system the actual stone installation went pretty quick and the pattern is groutless so once the stone was installed we were done (if only we had gotten enough stone to finish it that day…opps)
Next post I’ll update on how our cabinets are coming along which is what we’ve been working on most recently this Jan/Feb (thanks to another awesome neighbor who has borrowed us a heater for our woodshop a.k.a. two car garage).
Hi Becky! I love the way this is looking. I've been considering doing the same thing to our fireplace. You and I have a very similar setup so I was curious... How much stone did you need to complete your project?
ReplyDeleteIf I remember correctly it was approxiamtely 20 square feet (2 boxes) of flat and one box (10 linear feet) of corners. We got our stone from craigslist so the boxes were not quite full unforetunetly. Check out the installation instructions on bouldercreekstone.com for details on how to estimate the amount you'll need.
ReplyDelete